I have been given the task to empty the family camera’s memory card (this is my job to do since I’m the computer guy in the house) a few days ago. I took the card out of the camera, put it in a card reader and plugged the reader in my laptop. A red light turned on it but it turned off immediately which was not a good sign at all. My OS X complained that the disk was not properly dismounted. I tried the reader on other two laptops (two other OSes) but with no luck. I put the memory card back in to the camera and a few more photos were taken since then.
I bought a new reader yesterday, came home, put the memory card in and plugged the reader into my laptop. It took forever to read it (not a good sign at all) but after the card was recognized there were no photos on it!?!? I put the card back in the camera and it claimed that card has no photos on it as well!?!? My conclusion was that the card was probably corrupted.
There are a lot of good tools out there to restore data from corrupted memory cards but most of them are for Windows. I remembered once using a decent command line software which I tried to find but it took me a while (There’s a good paper on how we find information on the web that was found already in the past)1. It is called PhotoRec and is cross platform as well. Although their web site has detailed instructions on how to use the software I still wanted to share my straight forward procedure step by step on a Mac for less technical users (but you are still doing it at your own risk).
1. Download PhotoRec (the latest version is 6.11.3).
2. Extract the file in the Finder (I downloaded it in Downloads folder and this tutorial assumes it is located there)
3. Open the Terminal and type (watch out if you have a different version number):
$ cd Downloads/testdisk-6.11.3/darwin/

(pwd command on the screenshot just tells in which directory/folder are we located)
4. Run the PhotoRec with typing (no need to be super user or root, PhotoRec will show only external Fat16/32 drives):
$ ./photorec
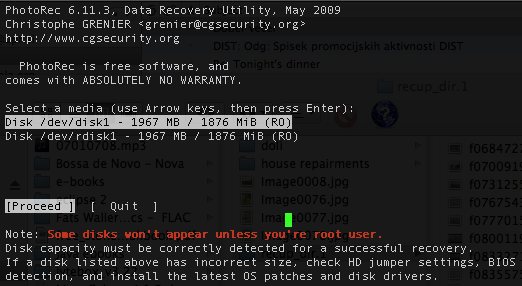
5. Select the appropriate disk (memory card) with arrow keys on the keyboard and proceed (press the enter key on the keyboard):
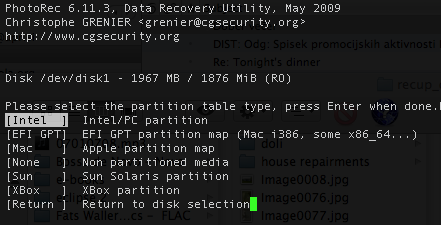
6. Select Intel/PC partition type with arrow keys and press the enter key:
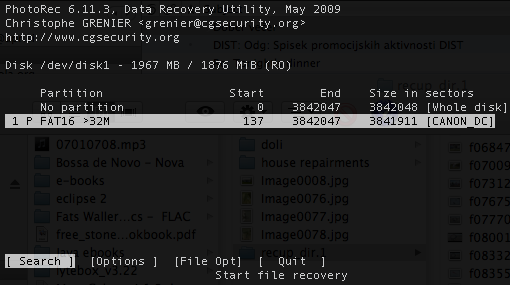
7. Select your FAT partition with arrow keys and press enter:
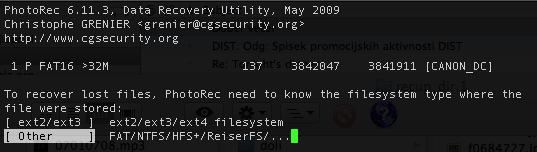
8. Select other and press enter:
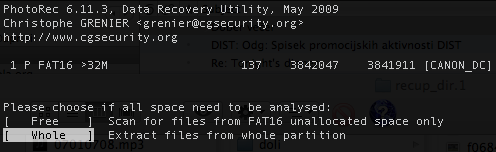
9. Select Whole and press enter:
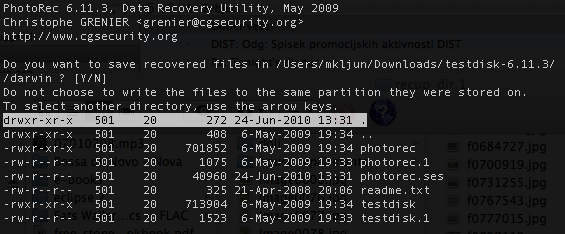
10. Type Y (no need to select other folders to store photos in) and it should start extracting photos.
Once it’s done you’ll see the window similar to the one below. You can close the Terminal.
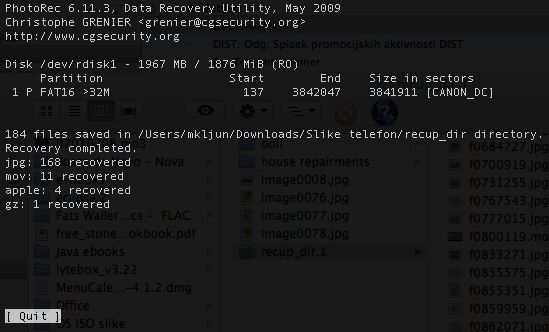
Your photos will be placed in Downloads/testdisk-6.11.3/darwin/recup_dir folder. If everything was OK of course.
1. R. Capra, et. al., Re-finding
found things: An exploratory study of how users re-find information, 2003